Letter with Me - Erf
This week’s Letter with Me word is Erf, a short word that, in some regions, means a plot of land. Since it’s such a tiny word, I thought we’d do something extra fun: a No Pencil Challenge with a splash of watercolor!
Lets put away the pencils and erasers, let go of perfection, and lean into play, experimentation, and happy accidents.
What You’ll Need:
Pen (different tip sizes are optional)
Watercolor (or any color medium you have on hand)
White pen (optional)
Paper (watercolor paper is best if you’re using watercolor)
What you won’t need:
Pencil
Eraser.

Step 1: Make Your Blobs
It’s always nice to be able to combine mediums for extra creative motivation. If you don’t have watercolors, no problem! Grab markers, acrylics, or any coloring tools you like and make some blobs. Try to different shapes so it’s not too uniform.
I made my watercolor blobs two ways:
Pigment-first: Load your brush with pigment and water, then paint directly onto the paper. This creates a more uniform shape.
Water-first: Lay down lots of water on your paper in a random shape, then drop pigment into it and tilt your page so the watery color flows and spreads unpredictably. This technique gives you more texture and natural, organic edges.
You can stick to one method or try both. The goal is not perfection. In fact, the less perfect, the more creative opportunities you’ll have later.


Step 2: Letter directly with your pen
Once your blobs are completely dry, we’re going to write “erf” in a simple monoline style, but try make each one different.
If you need inspiration, try incorporating the styles we talked about last week:
Adding serifs (those little “feet” on letters)
Script lettering
Bubble letters
Mixing upper and lower case
You can also let the shape of your blob inspire your letterform. For example, your “e” is taller than the rest, or your “f” curves a little differently than n ormal.
In my two examples above, I started with simple but different monoline, experimenting with different “e” shapes and orientations to fit the blobs. Then, I took them further by making the top blob more of a block letter style and the bottom blob more serif-y (thick downstrokes and including feet).
Finally, I cleaned up empty spaces in the letters to make the designs pop.
Step 3: Add Some Details

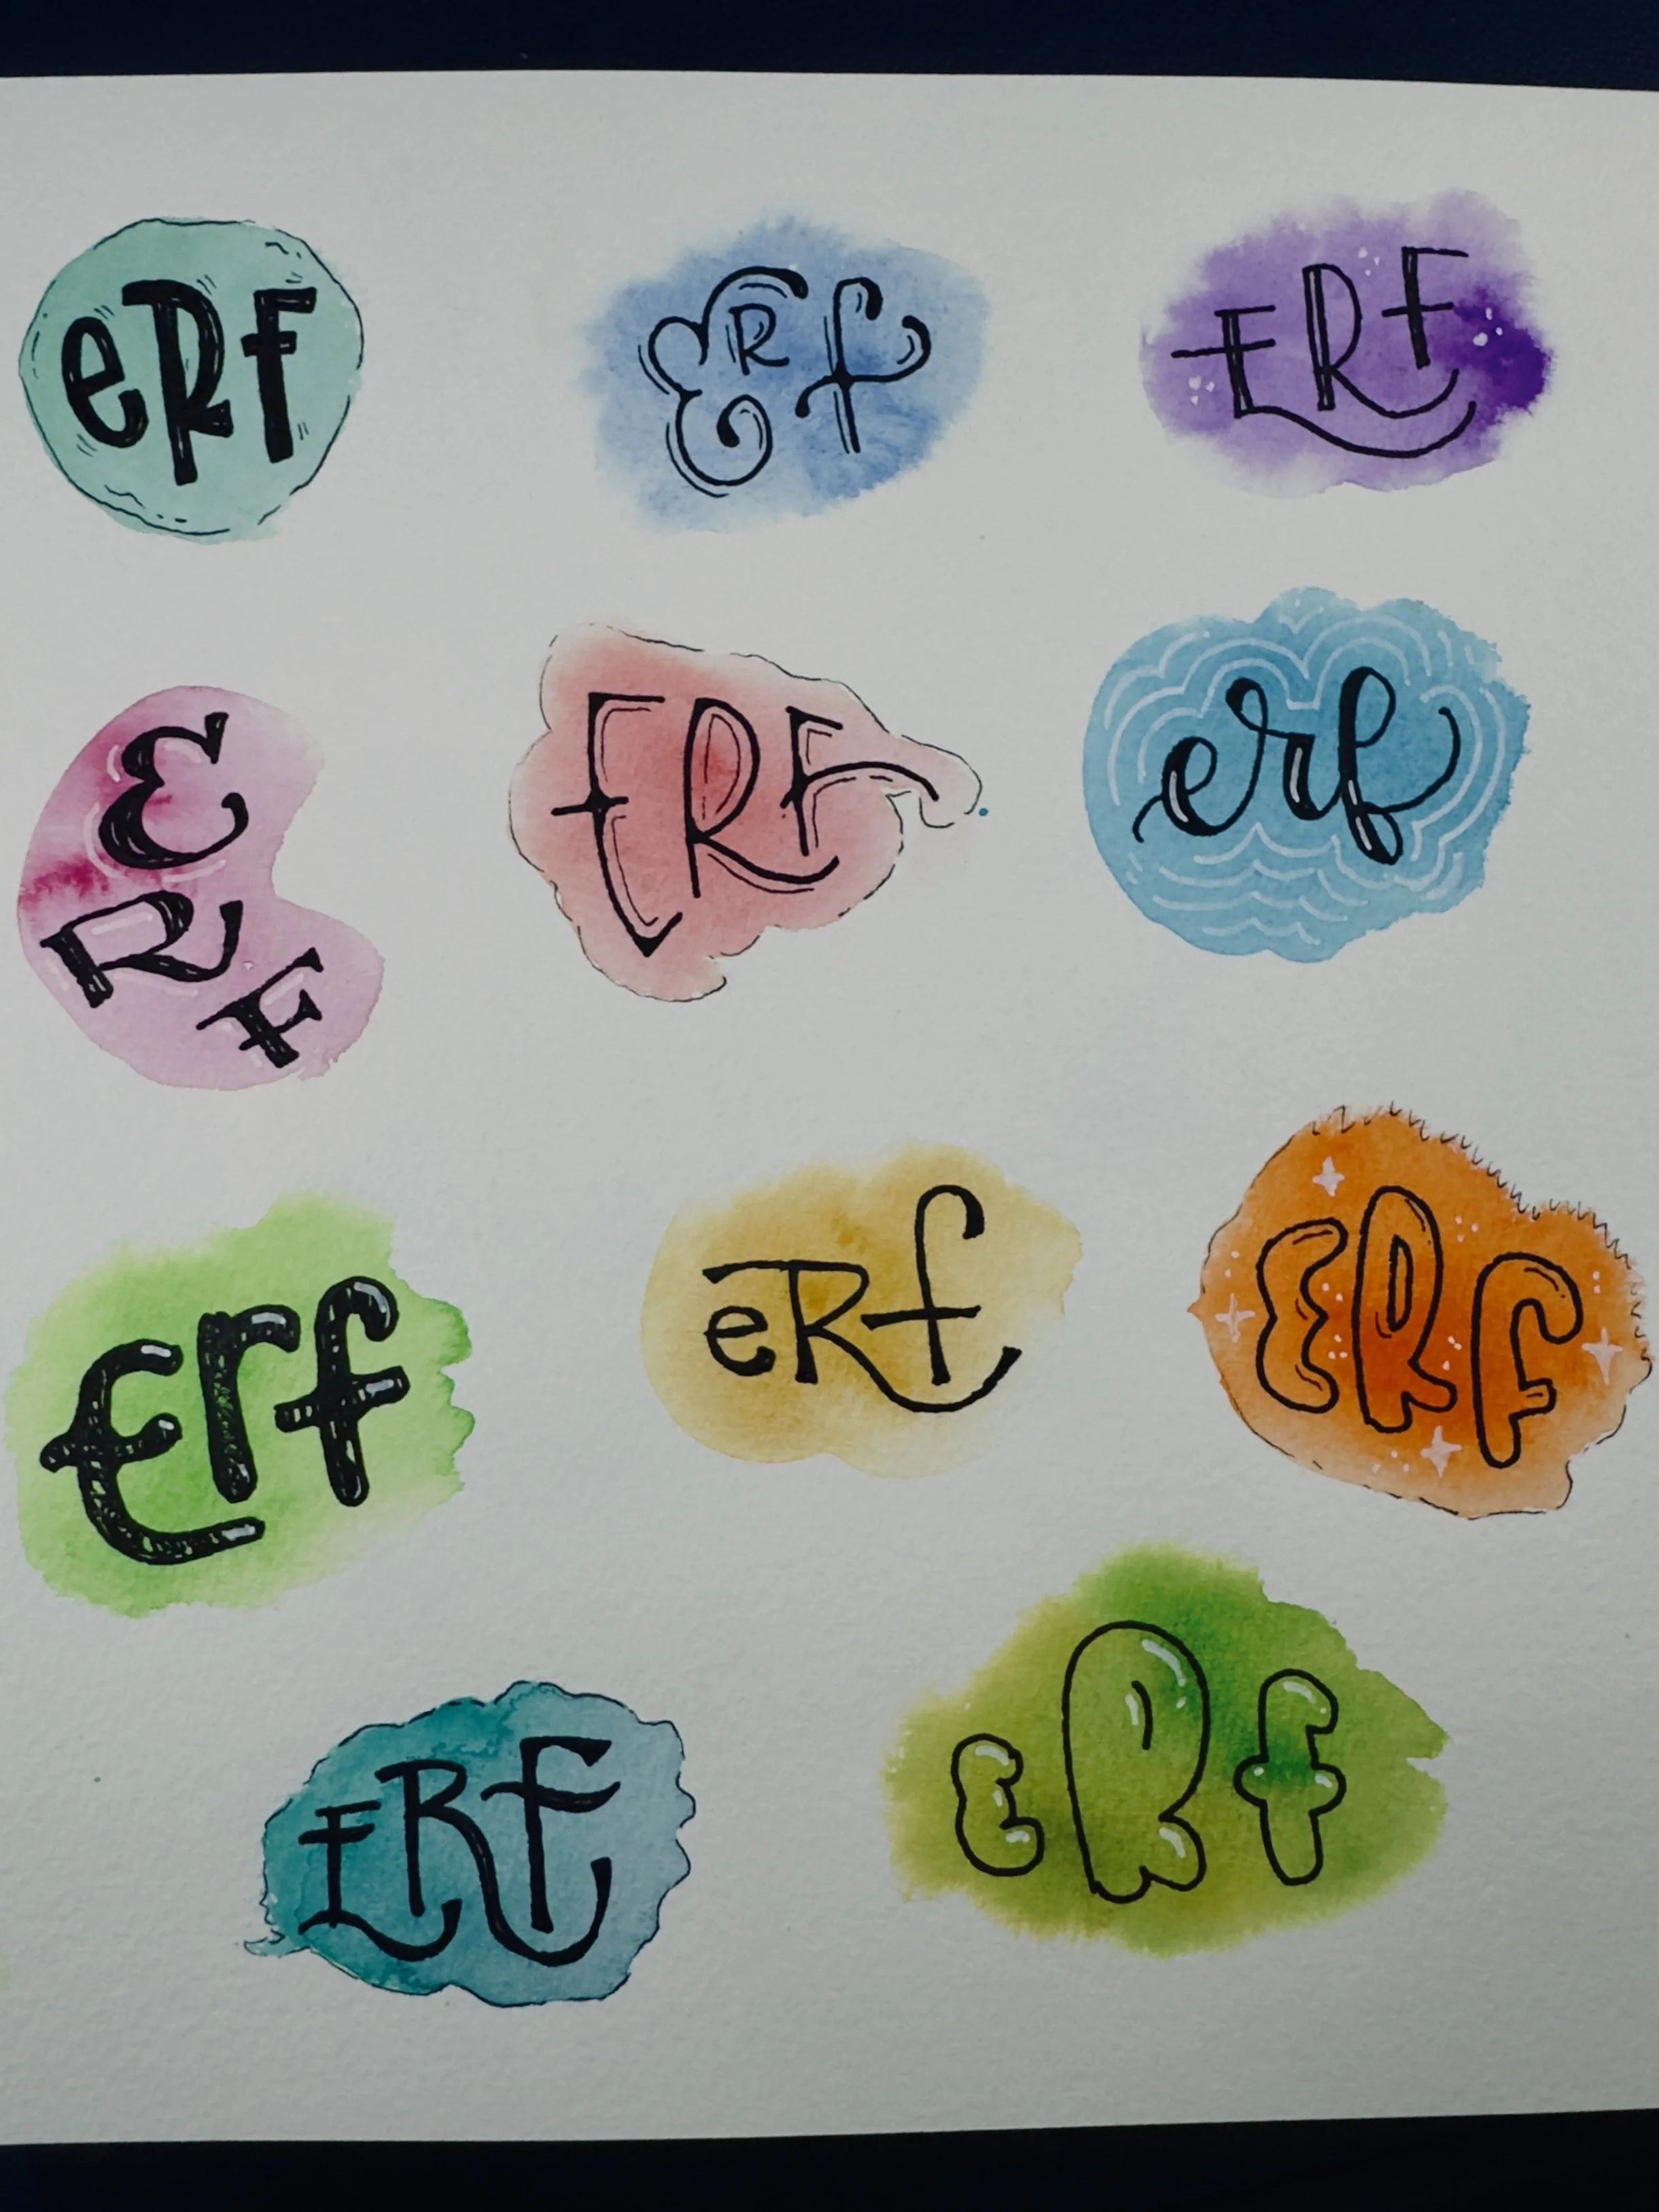
Once you’ve finished step 2, you can call it done. Or, if you’re like me and can never be done, you can add some extra details!
You can
Outline your blobs with a thinner pen
Add highlights, shadows, decorative lines, stars, or dots
Use a white pen for details on darker blobs
On lighter blobs, stick with black but vary your line weight for contrast
And now you’re done! You’ve got some lettering practice in while also making a piece of art 😁
Optional: Turn this Practice into a Month-Long Project
Want to take this further? Make 30 (or 31) blobs, one for each day of the month. Every day, fill in a blob with a word (or words) that represents your day. By the end of the month, you’ll have a visual diary, a colorful recap you can flip through and remember. Just don’t forget to label the month and year!
This exercise is all about letting go of “perfect” and giving yourself permission to experiment. We’re in our learning era, and learning is supposed to be messy, playful, and inspiring.
So grab your paints (or markers), make some blobs, and let’s see where “Erf” takes us!